The Extra Mile™️
We're done with what many would consider a fully-fledged pack. Zip it up, toss it in the right folder for TacO or Blish to recognize it, then test it in game to make sure it looks and works like you want, then publish that bad boy! But if you're one of those people that wants your pack to be spec-pack-ular, there's more to be done! (bonus points to you if you know the origin of that bolded joke word)
Now, these are all attached to achievement 3129 (as determined by the GW2 API), but each one is tracked by a different 'achievementBit' to specify whether THAT token specifically has been picked up. We're going to pretend there's only 10 tokens in this example and that they're in the right order. Back to Find and Replace!
GUID replaced with achievementId="3129" achievementBit="" GUID
Then manually fill in the achievement bits. For achievements that actually utilize bits, it matches the order displayed in the game UI (as far as I know), so be careful when using the wiki.
NOTE: achievementBits START AT 0, LIKE MOST ARRAYS, NOT 1. So the full set for 3129 would be 0-39, NOT 1-40.

Cool, so they look nice, and hide based on achievement progress. Stellar. But what if one or all of those are in a REAL TRICKY spot? The kind of spot that could benefit form some good old-fashioned text guidance? Meet tip-name and tip-description! Now these are specific to Blish HUD's Pathing module. They allow you to display hover text on the minimap/world map. Handy right? So now we'd like to display the token number (as listed in the achievements pane) as well as the description given so your users don't need to keep the hero panel or wiki open for guidance. After all that's the point of an overlay! To have the information available while you're in game!
One more Find and Replace, but then quite a bit of manual copy-pasta. Nobody said making a killer pack was easy work, but your users will thank you! GUID becomes tip-name="Token " tip-description="" GUID
Then it's a matter of filling in the blanks with info from gw2treasures, the wiki (again be careful!) or directly from the GW2API. "But Metallllll...That'll take forever!" you say. Fear not, this is where my green-belt (or relevant 1 above white-belt) experience in Excel Fu gets to proudly show off. We're going to be bouncing around and it might get confusing, but in the grand scheme of things, you're saving yourself work. I apologize if this is a bit hard to follow.
Current, unfilled tip fields on our markers:

-
Copy all the lines to Excel (or Google Sheets, or Apache OpenOffice, etc). Your spreadsheet editor of choice. I like to "Paste as Plaintext" to avoid bringing over the coloration from VSCode.
-
Data > Text to Columns > Delimited > Space > Finish
Result:

Delete a couple blank columns from the indentation, resize the remaining columns and (barring a few minor issues) we have our lines split up pretty nicely. Green cells can get left completely alone.

The meticulous among you may notice that we lost a couple " (quotations) in the translation. I'm not positive what the cause of this is at time of writing, but I'll update this section if I find out. It's a minor inconvenience. Text to Columns on column J again, because it didn't split properly. Typically, you only need 1 column where you want to fill info in, but I'm making 2 extras for those missing quotes.

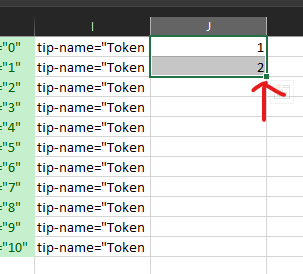
Drag extrapolation first. Establish a number pattern (in this case, it only takes 1 and 2 before Excel figures it out). Then select both and grab that tiny square in the corner that you may never have noticed before and drag that down as far as you need and marvel at one of Excel's many beauties.

Same principle for the next column, just do a single " and drag it down. You're saving yourself some hassle later, I promise. Copy that whole quote column and slap it in the column before GUID, while you're at it. Things are starting to come back together.

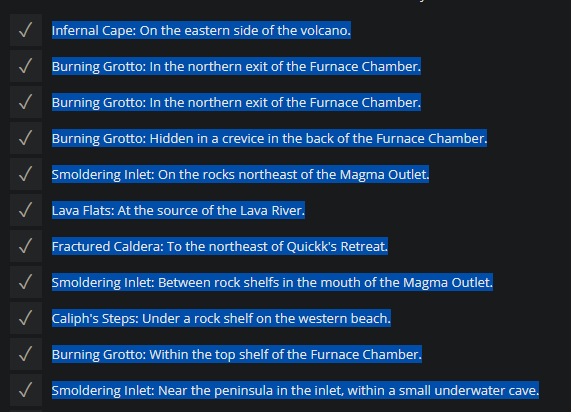
Now we just need those pesky descriptions. I'm grabbing from gw2treasures because they're easy to copy as a batch. Paste 'em all into that empty column! Those are looking like some meaty markers, friend. Good work. Big breath, we're on the final leg.


At this point, I like working with these nearly-finished markers in Notepad++ because I'm intimately familiar with how to abuse the absolute life out of its specific Find and Replace functionality. You're welcome to kick them back to your preferred editor and do it there, I understand if you don't want to add ANOTHER tool to the pile. Copy ' em all, paste in. You're going to want to turn all the tabs back into spaces. N++ has an "extended" function that allows you to use "escape characters" which are typed symbols beginning with \ that equate to specific other things, like tab or variations on "Enter". Ctrl+H > Extended > \t becomes .

There's a few errant spaces that won't affect functionality, but I'm a bit of a perfectionist in my work, so bye bye! Ctrl+Z, but this time, we're replacing \t\t with \t. Repeat until it replaces 0. I'm also going to remove those pesky tabs at the end (these can be avoided if you're particular with the cells you grab from Excel. \t\r\n becomes \r\n. And yet there's STILL some errant tabs related to those quote columns we made. \t" and description="\t both become just ". Specify more than just "\t, because otherwise it will start slamming together other fields that were green in Excel. Finally, finish up with a \t to once more and marvel at your work. I know it seemed awful, and you might just prefer to copy and paste those 40 descriptions in rather than this whole ordeal, but once you start working with dozens, hundreds, or thousands of markers, potentially all at once, you'll be back. And I'll be here with a hug and some coffee, because we've got work to do, you glorious budding Markermancer, you!
